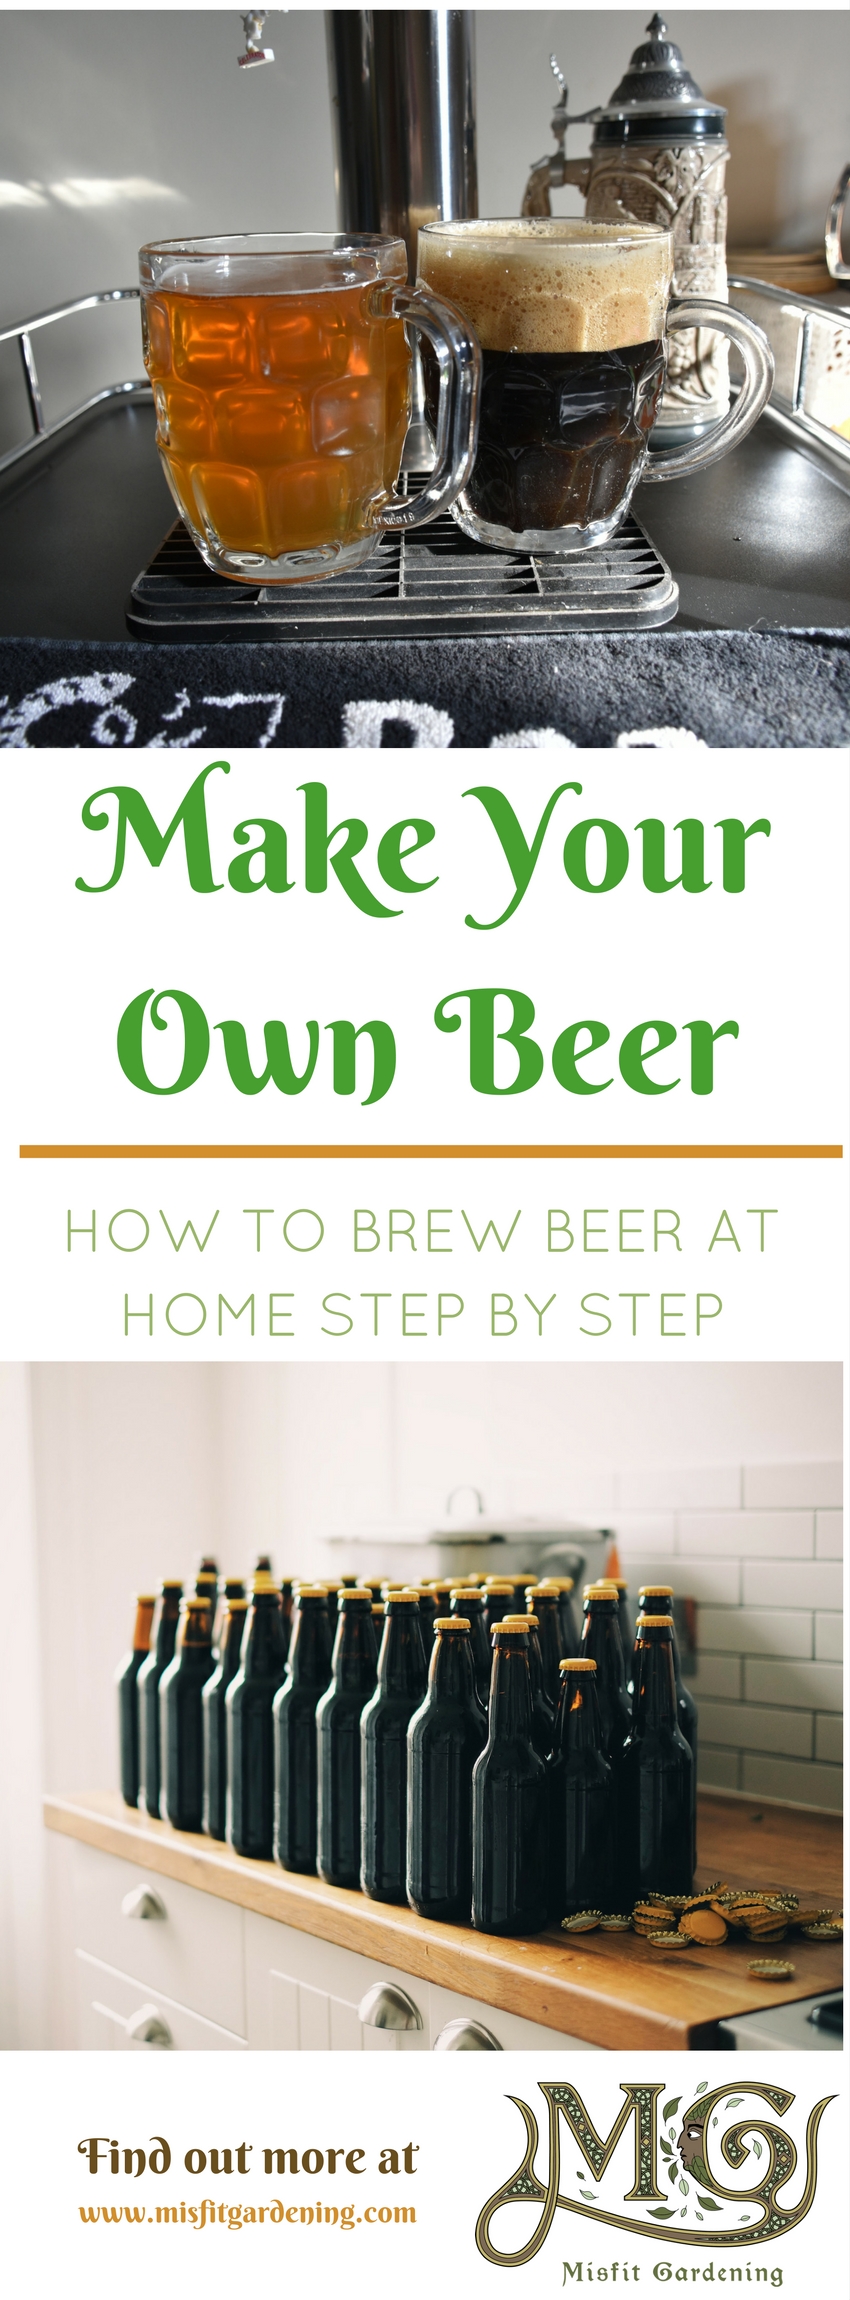
Brewing beer is pretty straightforward and hopefully something you will enjoy and do again and again. We’ve taught many friends and family how to brew beer and this post will show you how to make beer at home step by step.
This post contains affiliate links: I am grateful to be of service and bring you content free of charge. In order to do this, please note that when you click links and purchase items; in most (but not all) cases I will receive a referral commission. Your support in purchasing through these links enables me to keep blogging to help you start homesteading and it doesn’t cost you a penny extra!
See Disclosure, Terms and Conditions for more information. Thank you for supporting Misfit Gardening.
Beer Brewing Kits
If you are an absolute beginner at brewing beer or you have never done so, I would recommend kits to start with. Extract kits are readily available and you can buy good craft beer kits and there are even clone brew kits of popular beers available.
I started with a strong English ale, my favorite kind of beer about 10 years ago and I brewed extract kits right up until about 3 years ago. Even though we design our own beers, brew from recipes online and in books we own, we still buy kits to brew.
.gif "Single Hop Recipes at MoreBeer.com")
![]()
Extract Kit Benefits
Extract kits are usually pre-measured ingredients and the brewing instructions although you can buy equipment and beer kit all in one, some websites will ship homebrewing starter kits for free. Homebrewing kits will come with the yeast, bags to hold any specialty grains that come with the brew, the grains, hops, liquid malt extracts (known as LME) and dry malt extracts (known as DME). The malt extracts are what provides the sugars for the yeast to ferment into alcohol.
Extract kits are:
- Easy to use
- Come in 5 gallon or 1 gallon recipe sizes
- Quick to make
- Can be made in a kitchen
If you would like to see what comes in an extract kit, take a look at the unboxing of a local craft beer from my local brew store in the video below:
Stay tuned for more brewing, gardening and homesteading videos by subscribing to the Misfit Gardening YouTube Channel.

How To Make Beer at Home Step By Step
There are several steps to make beer and they are:
- Clean and sanitize equipment
- The boil and hops addition
- Pitching the yeast
- Primary ferment
- Secondary ferment
- Bottling or kegging
Read on to find out more about each step.
Cleaning and Sanitizing Brewing Equipment

It is really important to clean and sanitize your equipment. Poor sanitation can lead to bad beers from wild yeasts and microbes setting up home in your brew.
You can watch the video below or read on to find out more about cleaning and sanitizing home brewing equipment.
There are lots of options available for cleaning and sanitizing your home brewing equipment. I like to use a non-scented dishwashing liquid to get any dust, dirt or grime off my equipment then to use a no-rinse surface sanitizer.
My favorite sanitizer is StarSan but there are others available which are popular such as PBS or powdered bleach solution and PBW or powdered brewery wash depending on where you are from! Be sure to follow the directions on the sanitizer for how to use and if rinsing is necessary.
I like to soak small parts and tubing in the sanitizer solution whilst I am boiling the wort to they are ready to use when the wort is cool. Others like to leave the cleaning to when the wort is cooling down or to sanitize at the very beginning.

![]()
Brewing with an Extract Kit
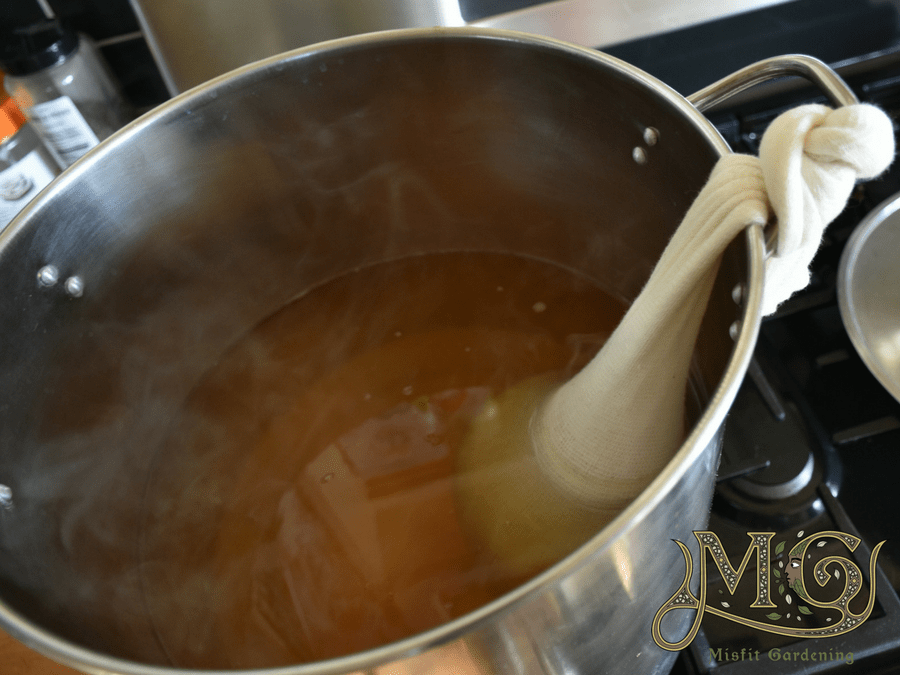
Follow the directions in your recipe kit for best results, that’s why they are there! In general, the brewing process is boiling water, adding the malt extracts and the bittering hops then boiling for 60 minutes. There may be other hops additions throughout the brew for flavor and aroma or additions of other ingredients such as Irish moss or Whirlfloc to help make the beer clear.

You can watch the brewing process of a local craft brewery IPA kit in the video below:
Be sure you have a large stock pot and long handled spoon for the boil.
How To Pitch Yeast
After you have boiled the ingredients, the liquid is known as the wort. This needs to be cooled down quickly so that you can pitch (or add) the yeast.
A wort chiller is the quickest way to cool your wort but it isn’t necessary. You can fill the sink with ice and cold water and place the brew pot or stock pot in there or even use a bath tub which has cold water and ice in it. Be sure to keep the lid on the pot to keep out any wild yeasts in the air.
Yeasts come in dried packets or as a liquid and can be added at different temperatures. Check the label on your yeast for the best temperature range to add your yeast. Check the temperature of your wort with a thermometer but you must sanitize the thermometer before it goes into the wort!
Some yeasts, in particular dried packet or smack-pack yeast needs to be activated before use. The yeast packets explain how to do this. For dried yeast, try sanitizing a glass cup or jug then add a teaspoon of sugar in 2 cups of lukewarm water into the container and sprinkle the yeast on top. The yeast will bubble showing that it is active.
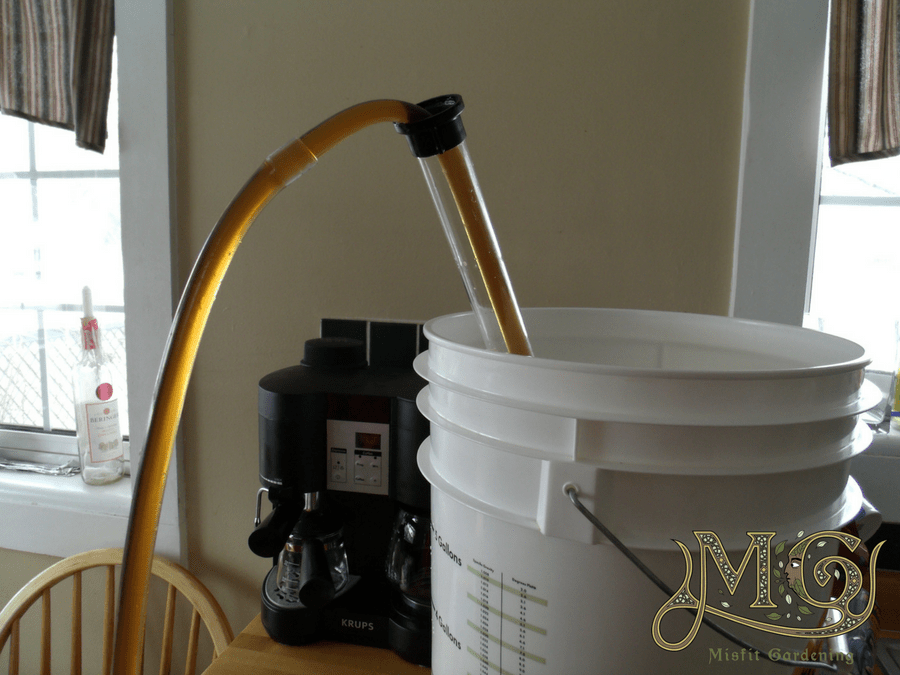
Once your wort is cool enough to add the yeast, transfer the wort to a clean and sanitized brew bucket. Top up the wort to the level so for a 5 gallon beer kit, ensure the wort is at 5 gallons, if it is low simply add cold water. You can then pour in the yeast.
Liquid yeasts must have the outside of the packet sanitized before opening.
Related post: The Basics of Home Brewing Equipment

![]()

Primary Fermentation
For a good home brew beer, the yeast needs to be aerated or have oxygen added to help it get established properly in your wort.
You can place the sanitized brew bucket lid onto the brew bucket and rock the bucket back and forth as I do in the video above to aerate the wort.
Top Tip: You can use a new, clean, sanitized aquarium pump and air stone. This is an easy way to get oxygen to your beer.
When your yeast is nicely aerated, you can fill your sanitized airlock with water and place it into the rubber bung or stopper in the brew bucket lid. Be sure to move the bucket handle out of the way of the airlock so when you pick up the bucket, you don’t knock the airlock.
You want to move the brew bucket to a cool dark location for the first or primary fermentation which is about 7 days. A basement is ideal but I used to use a bathtub.
Check that your beer is fermenting, it will be producing steady bubbles within a day.
The primary fermentation is where the majority of the sugars from the malt extracts are converted into alcohol.
Secondary Fermentation
After the first fermentation, the beer is racked (transferred) into another clean, sanitized container. This may be a brew bucket or a carboy depending on your preference and availability. I use an auto siphon or racking cane to transfer the beer into the next container. The secondary fermentation is a longer, slower fermentation produced by the yeast.
Typically, the beer is in the secondary container for the secondary fermentation for 7 to 10 days however, some home brewing recipes need longer in the secondary and may include lagers and Scottish heavy beers, Trippels and a couple of others. Don’t let the long wait put you off, like a good wine the flavor in these beers improves during that long secondary fermentation.
Some beer recipes need other flavors added at this point or more hops (this is known as dry hopping). Other flavors may be cask chips for flavor, herbs or fruits or flavor extracts. The video below shows dry hopping for the IPA.
Top Tip: Check for bubbling for a few days before you plan to bottle the beer, this will help prevent exploding bottles which happens when the fermentation hasn’t finished and the booze has been bottles. The yeast continues to ferment creating carbon dioxide in the bottle which can’t escape. The pressure builds up causing the explosion and a messy clean up afterwards.
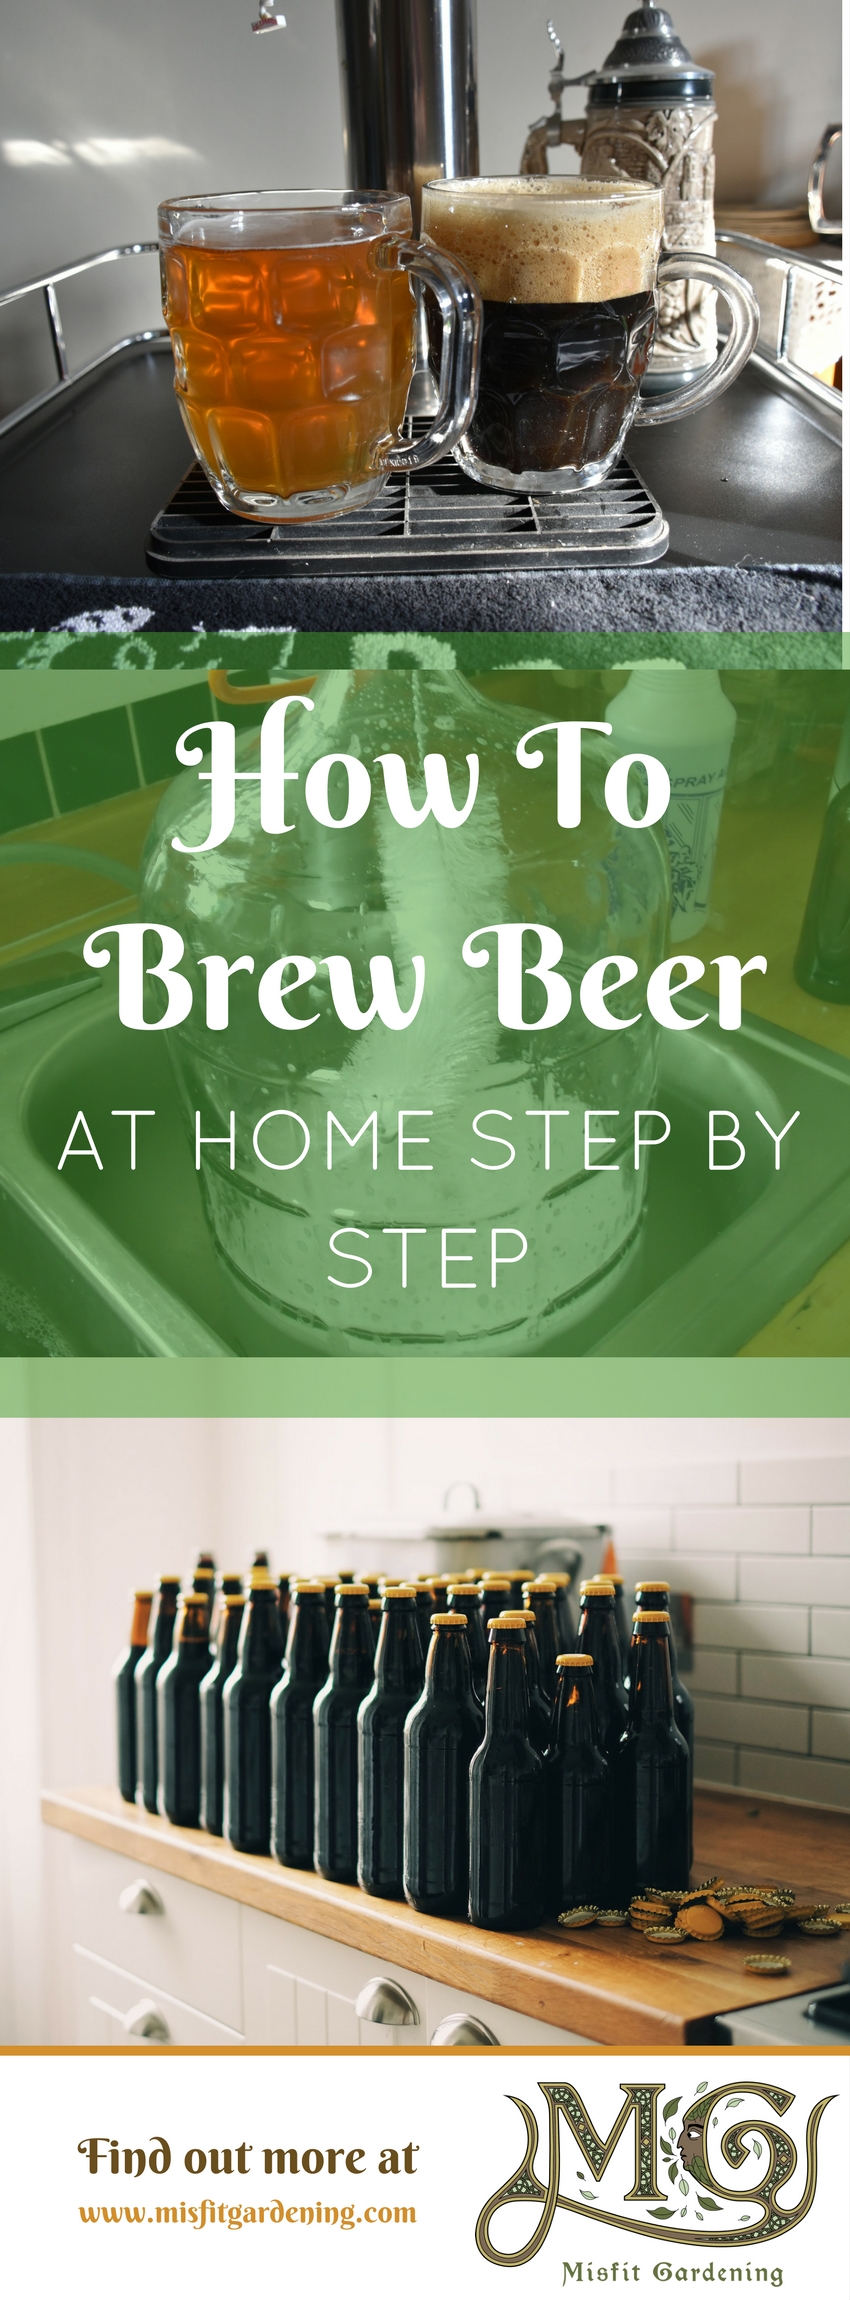
Bottling and Kegging
We now keg our beer into a Cornelius keg and hook it up to a kegorator.
To bottle beer, I like to use a bottling bucket which is a 5 gallon bucket with a tap or spigot on the end. You will also need 48 12-ounce bottles and plenty of bottle caps plus extra and a bottle capper.
Top Tip: Check the height and capping with a bottle and cap before you clean and sanitize. Make any necessary adjustments before you begin bottling.
Clean and sanitize your bottles and caps. You can load your bottles in the dishwasher and run it on the sanitize cycle or you can soak them in sanitizer like StarSan. Sanitize your bottling bucket and spigot inside and out and a racking cane.
Your recipe kit will tell you how much sugar to use for bottling but typical quantities are: boil ¾ cup priming sugar or corn sugar or 1-1/4 cups dry malt extract in 2 cups of water for 5 minutes and let this cool. Pour this into the bottling bucket.
Siphon transfer (rack) your beer from your secondary fermentation container to the bottling bucket. Ensure the tap is closed!!!! Make sure that the siphon hose is at the bottom of the bucket so the transferring beer evenly mixes the sugar water with the beer for uniform carbonation. Avoid transferring sediment into the bottling bucket, keep an eye on the level in the secondary container being transferred.
Place the bottling bucket on a table or counter and an old towel on the floor; you will get some drips. some paper towels and sanitizer in a spray bottle will be useful too.
Place the clean, sanitized bottle under the tap and turn it on. Fill the bottles to about 1” from the top and turn the tap to stop the flow. Place a sanitized cap on the bottle then crimp the cap closed using the capper.
Label the bottle and let them sit for 2 weeks undisturbed upright at room temperature in the basement or in the bathtub. After that, chill your beer and enjoy!
Top Tip: If your carbonation seems ok after 3 weeks but then seems to be over-carbonated after 5-6 weeks, reduce the amount of priming sugar by 1 to 1-1/2 tablespoons in your next batch of the same beer.

![]()
Beer Brewing Resources
You might like the following related posts and videos:
Video: How To Make Peach Wine
Video: How To Make Peach Mead (Peach Melomel)
Video: Pitching Yeast In Fruit Wine
Video: Secondary Ferment and Racking Wine
Post: The Basics of Home Brewing Equipment
Post: Secondary Fermentation
Post: All Grain Brewing
Recipes:
Equipment & Kits:
If you liked this post please take a moment to share it using the share buttons below or pin the image below to Pinterest and save it for later.
Always ensure to operate safely. All projects are purely “at your own risk” and are for information purposes only. As with any project, unfamiliarity with the tools, animals, plant and process can be dangerous. Posts, podcasts and videos should be read and interpreted as theoretical advice only and are not a substitute for advice from a fully licensed professional.
As remuneration for running this blog, this post contains affiliate links. Misfit Gardening is a participant in Affiliate or Associate’s programs. An affiliate advertising program is designed to provide a means for this website/blog to earn advertising fees by advertising and linking to websites offering products described in the blog post. It does not cost you the Reader anything extra. See Disclosures, Terms & Conditions and Privacy Policy for more information about use of this website.
Share this:


Great job, very in-depth information here. It’s almost impossible to really create an all-inclusive “how to brew” article, since the topic could easily fill a whole book…. which I suppose it has. Several of which I own. Anyway, nice job, I can tell you worked hard on this one. I found it looking for inspiration!
Thank you very much!
I’m very passionate about beer and homebrewing. I hope it helped you out! Cheers!